How do I collect a deposit?
Collect a deposit from the dashboard: create it, take payment through the checkout flow, and track its status through to the final invoice.
Updated on July 4, 2026
View as MarkdownYou create a deposit from an appointment, a project, or the Deposits page, then collect it through the same checkout flow used everywhere else on the dashboard (card, cash, remote link...). Once collected, it shows as "collected" in the deposits list, then moves to "applied" once it's deducted from the final invoice.
Set your deposit policy
Before collecting a deposit, you can set the rules per service type under Finance > Deposit policy.
- A default rule applies to every service.
- You can add an override for a specific service (flash, custom project...).
- Each rule works as a fixed amount or a percentage of the price, with an optional minimum amount.
- The amount suggested when you collect a deposit is pulled from this policy: the percentage or amount you've configured for that service.
Create a deposit
From Finance > Deposits, create a new deposit and attach it to a client and, if relevant, an appointment. You can also start directly from an appointment or a project: the suggested deposit amount follows the policy set for that service.
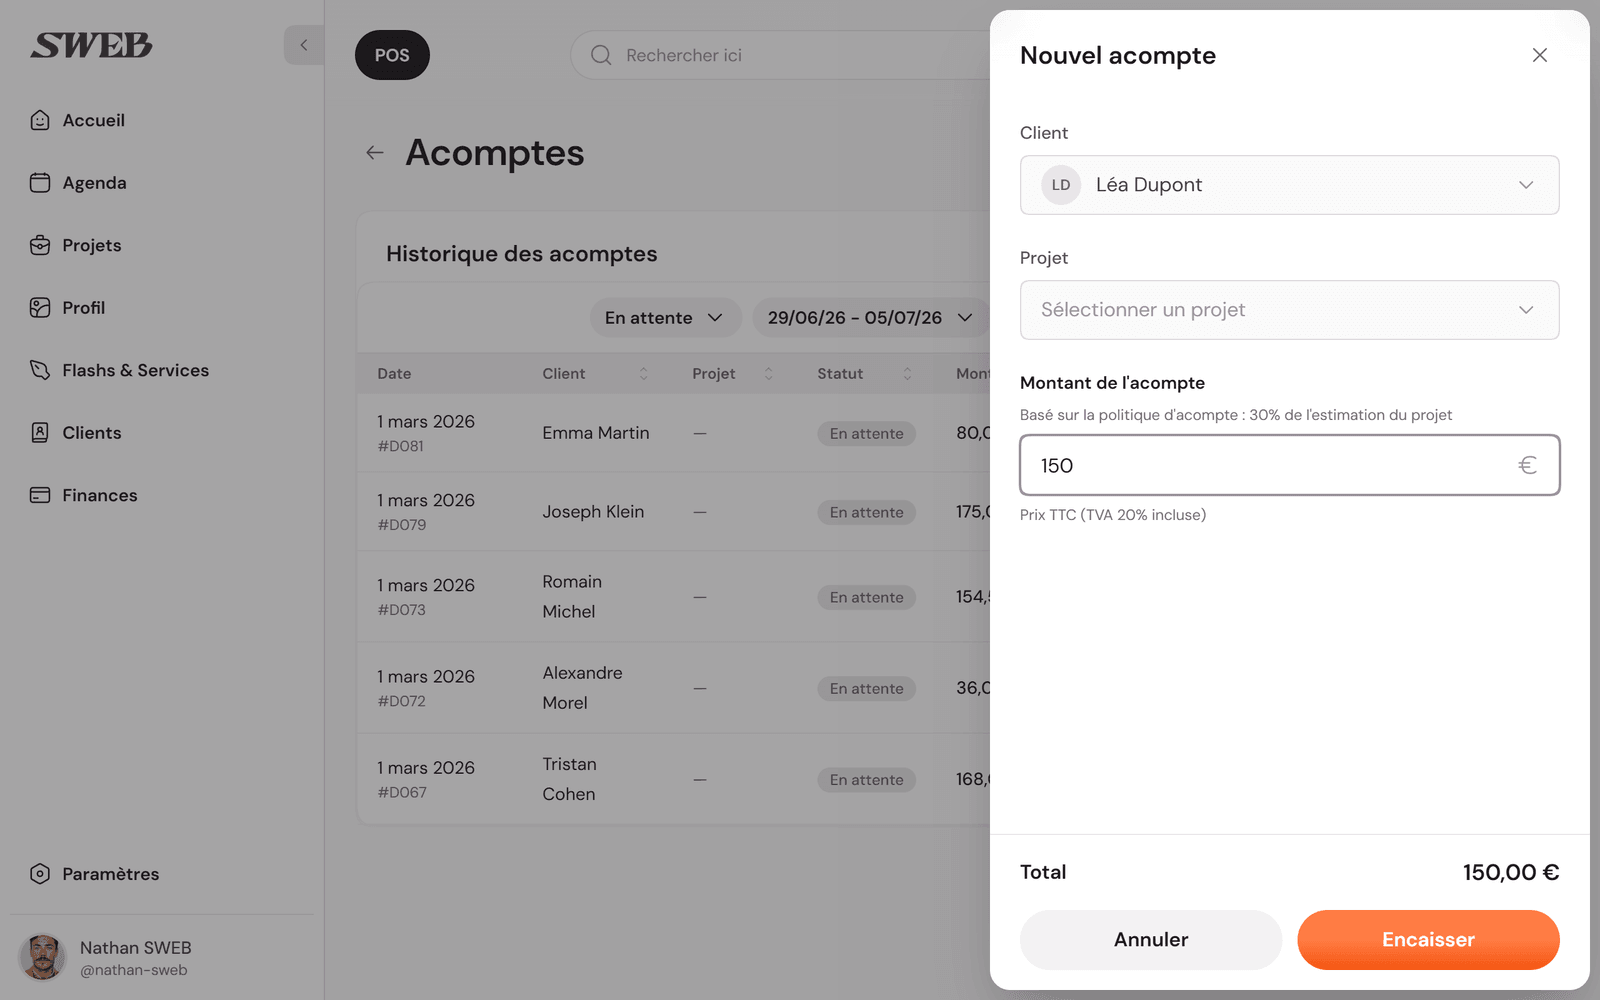
Collect the deposit
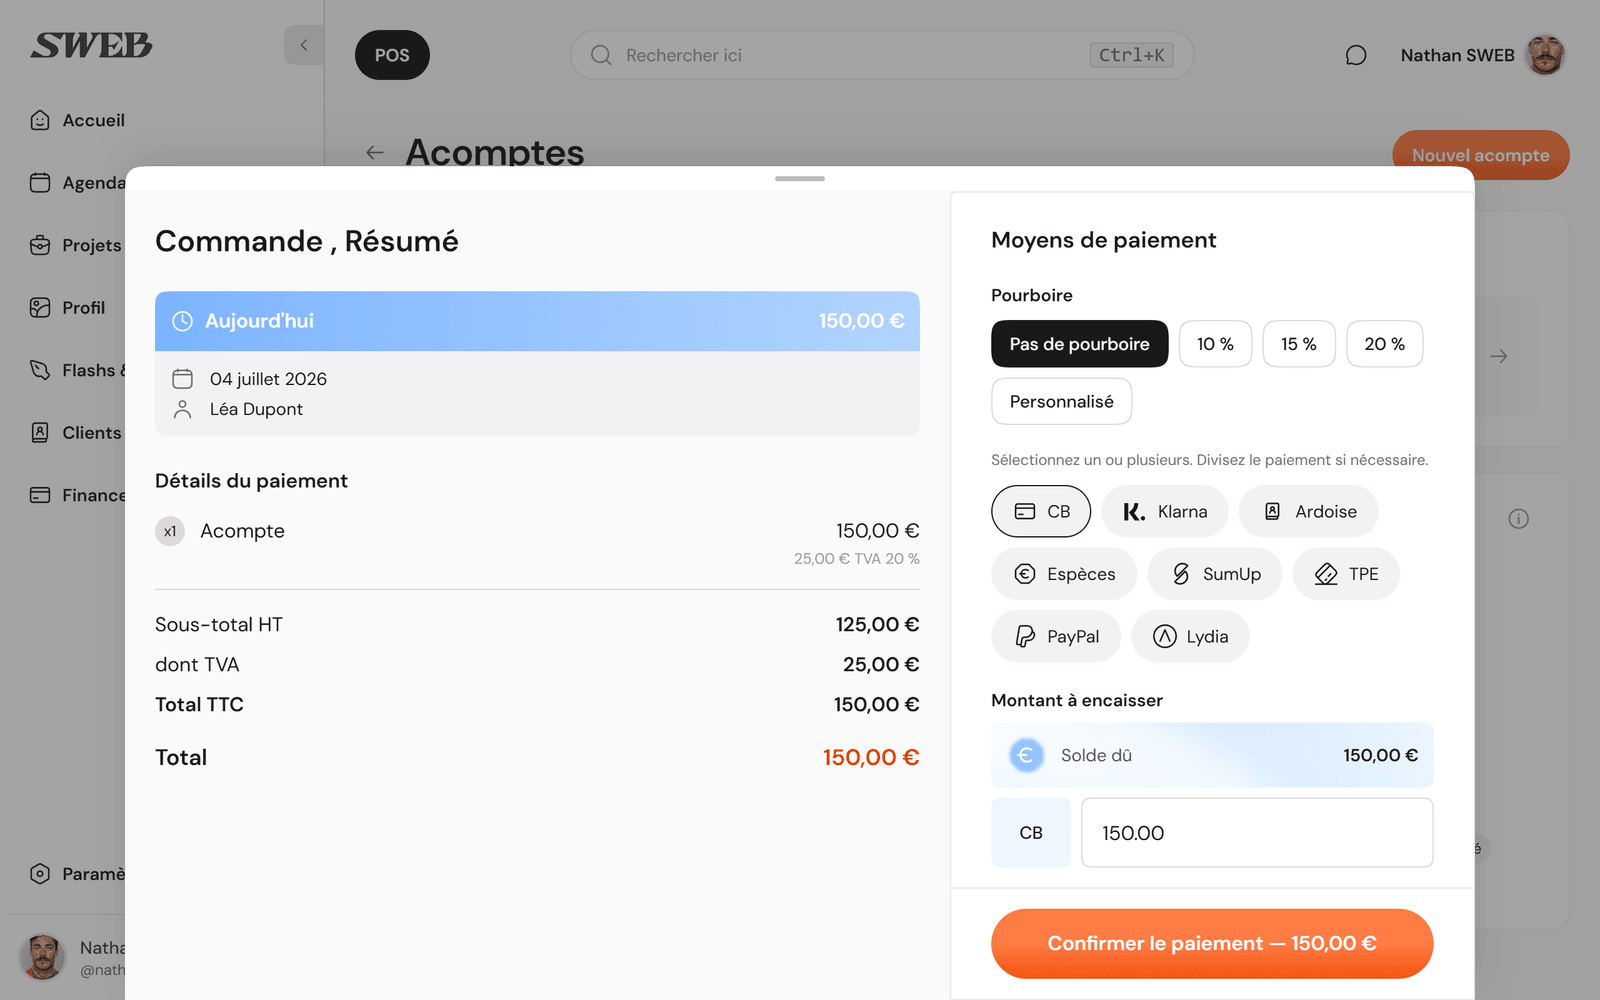
Collecting a deposit goes through the same checkout flow as any other payment on the dashboard. You can open it from several places.
- The Deposits page, on a pending deposit.
- The related appointment.
- The related project.
- The calendar, straight from the time slot.
The checkout flow opens as a side panel (or full screen from the register). Pick the payment method or methods, collect the payment, then confirm. Confirming creates a numbered, tamper-proof fiscal receipt as required by French NF525 rules: you can then email the receipt or generate an invoice.
Track a deposit's status
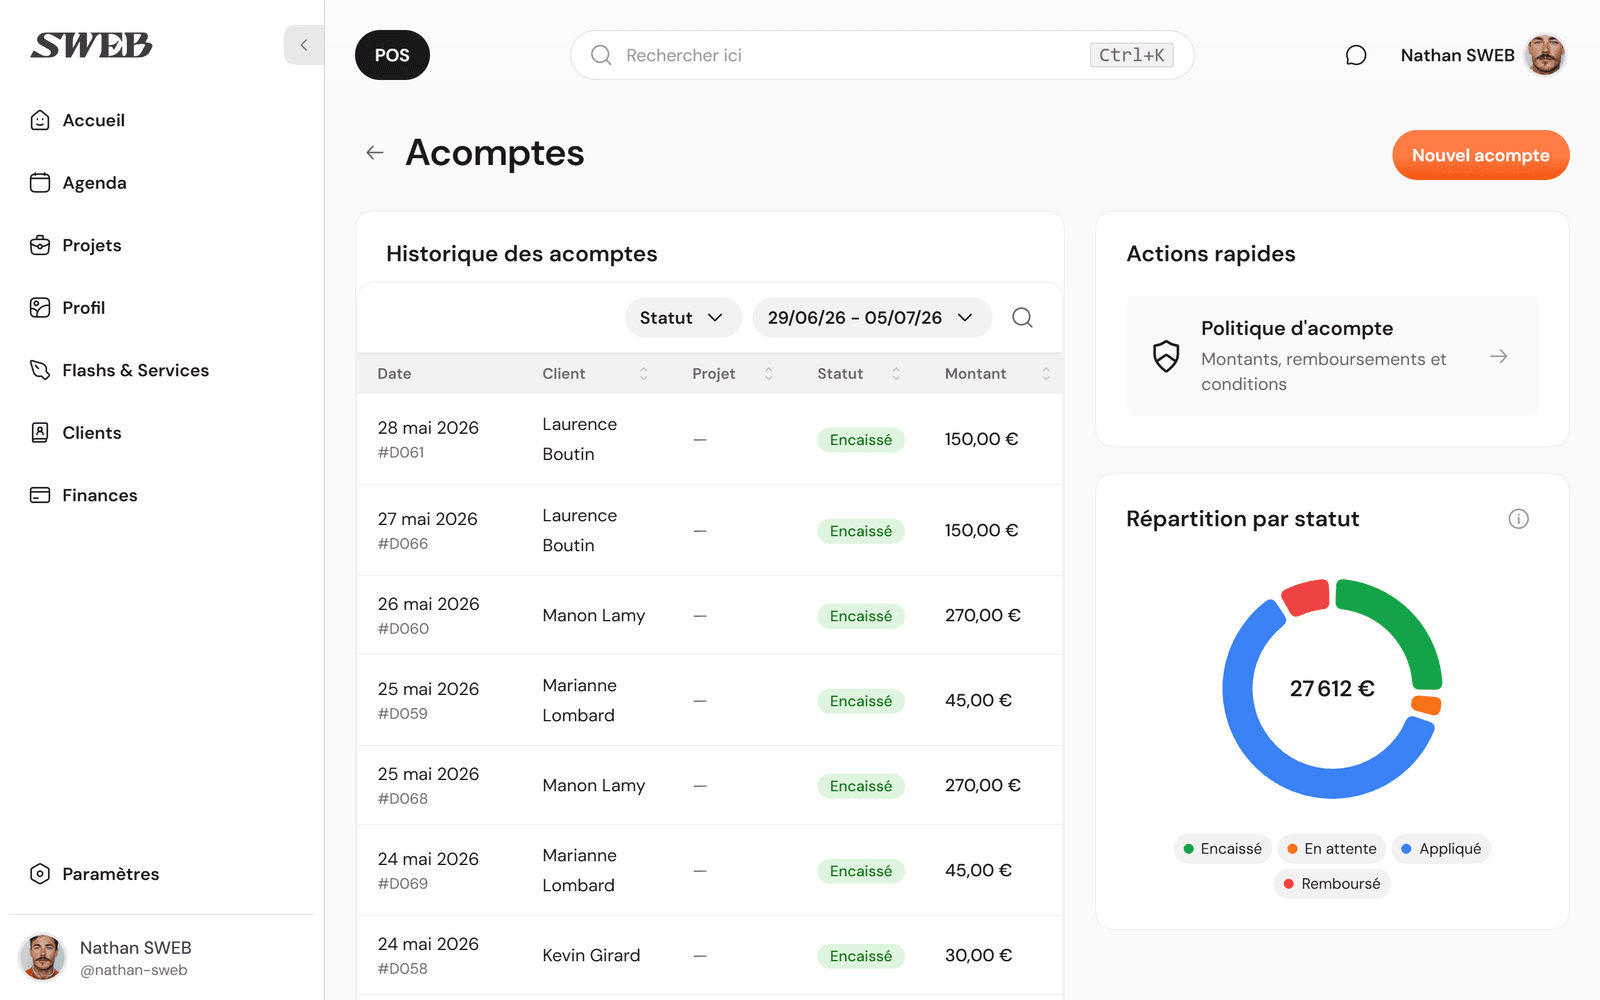
A deposit moves through a few statuses, visible in the Finance > Deposits list.
- Pending: created but not collected yet.
- Collected: payment confirmed through the checkout flow.
- Applied: the amount has been deducted from the client's final invoice.
- Refunded: the deposit has been given back to the client.
The Deposits page also shows a status breakdown so you can spot deposits still waiting to be collected at a glance.
Edge cases
The client cancels the appointment. You can mark the deposit as refunded from its detail view, no need to reverse anything else.
The appointment turns into a project. The deposit's status can then follow the project's own tracking (pending, partially paid, paid) without any double charge: a collected deposit is never asked for again at final checkout, only the remaining balance gets billed.
The suggested amount looks wrong. Check the deposit policy for that service under Finance > Deposit policy first: it's what sets the rate or the minimum amount applied.
Related articles
Was this article helpful?
Didn't find your answer? Contact support: hello@sweb.so